
This tutorial will teach you how to create a simple database in FileMaker Pro. In today’s blog, for Part 1, we'll review the basics of FileMaker, how to create the file, and adding tables and fields.
The Basics
In every FileMaker database, there is a hierarchy of components:
File - creating a new, empty [FileMaker] file to begin developing your custom database
Table - organizes and groups your data by common categories. By default, there is a table that will automatically populate with the same name as the file. This can be renamed or deleted if it’s not needed. Tables include information such as a primary key field (i.e. Customer ID), account name fields (to track who created the record and who last modified it), and timestamp fields (to track when the record was created and last modified).
Layout - contains fields, objects, pictures, and parts that represent how your information is presented and organized when you browse, find, design, or preview records. You can design a variety of layouts for multiple different purposes.
Record - one set of fields in a database containing data about a single subject or individual.
Object - an object can be a line, field, text, button, button bar, segment, popover, tab panel, field, or portal.
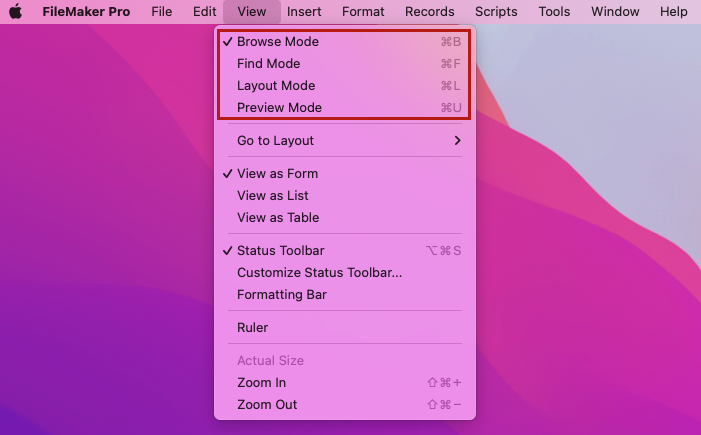
In addition, there are four different viewing modes within FileMaker you should be aware of:
Browse mode - a “user mode” which allows you to work with the data
Find mode - allows you to conduct a search for records in that layout
Layout mode - designing and building the layout
Preview mode - how the document will look printed out or in pdf form
Create a new project
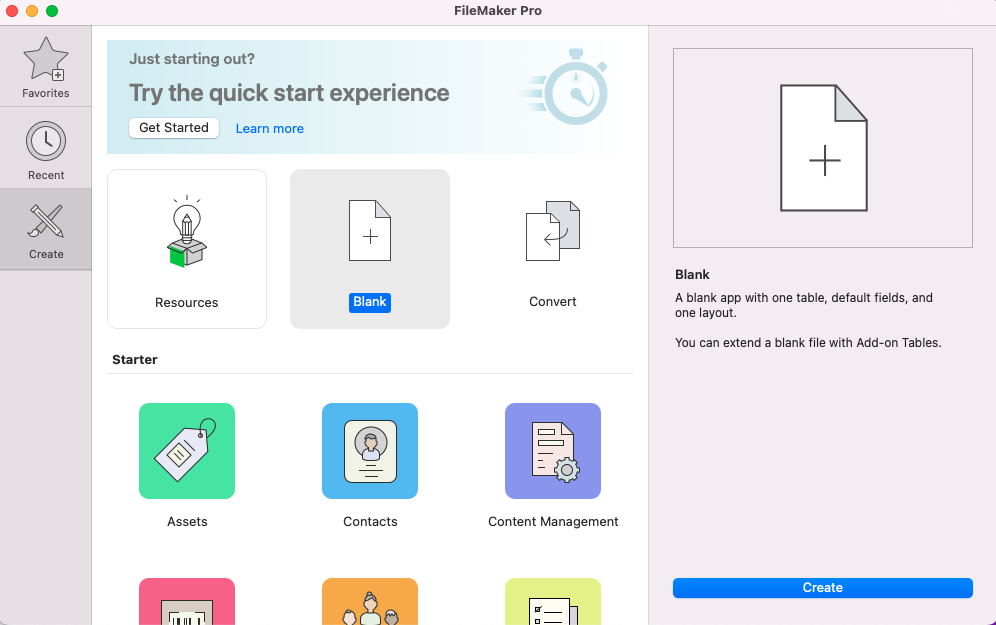
To start, open FileMaker and go to File > Create New. You'll see a dialog box with the option to select a Blank Database or a Starter App. For the purpose of today’s article, choose Blank Database, click Create, and Save File.
Add tables and fields
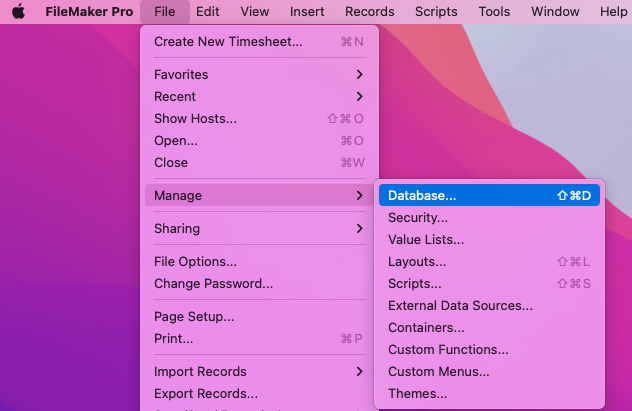
Now you're ready to add data to your new database. Typically, once you save the file, a dialog box should automatically populate, providing the tables and fields lists. However, you can also easily access this window by going to File > Manage > Database.
In this dialog box, you may notice a table is already listed along with fields already inputted, which you can either use, edit, or remove. For additional data, you can simply add a new table and fields to the database. To do this, under the Tables tab, you will type in the Table Name and click Create. Once the new table is created, click into that table and it’ll move you to the Fields tab. Here, you will type in the new Field Name, select the Type (text, number, date, etc), and click Create. Click OK when finished entering all tables and fields.


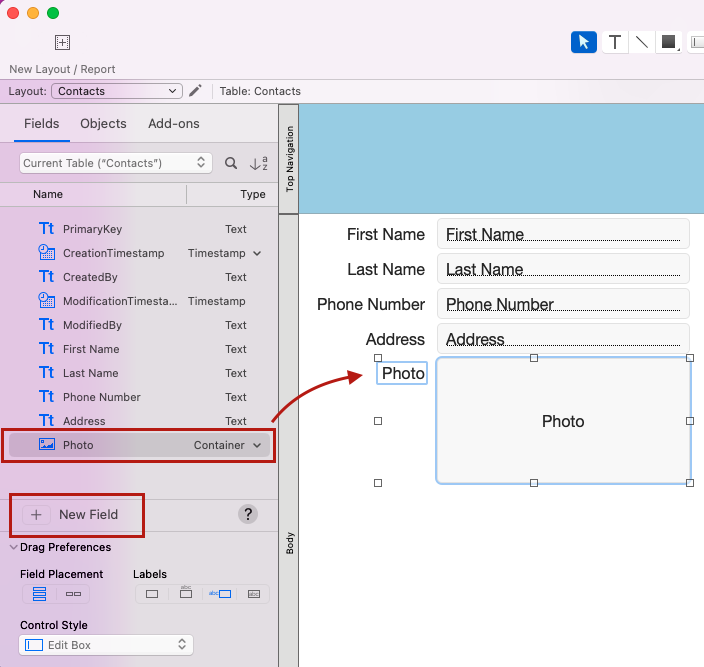
Now, once you’ve exited the dialog box, you should see the fields you’ve added automatically displayed. If this is not the case or you may need to add fields, you can go to View > Layout Mode (make sure to select “Show Panes” in the upper right hand corner) and you can create and drag & drop each field from the left hand side.
Now that we’ve accomplished creating the database, tables, and fields - stay tuned for Part 2 next week to cover relationships, importing data, and completing the database.
PK Information is a FileMaker-certified development agency serving the Tampa Bay and Knoxville regions. We believe that great software can change everything. Would your database benefit from a process review? Contact us today!